Showing posts with label Zvezda Models. Show all posts

Monday, September 28, 2015

UPDATE: SU-2 Almost Done.

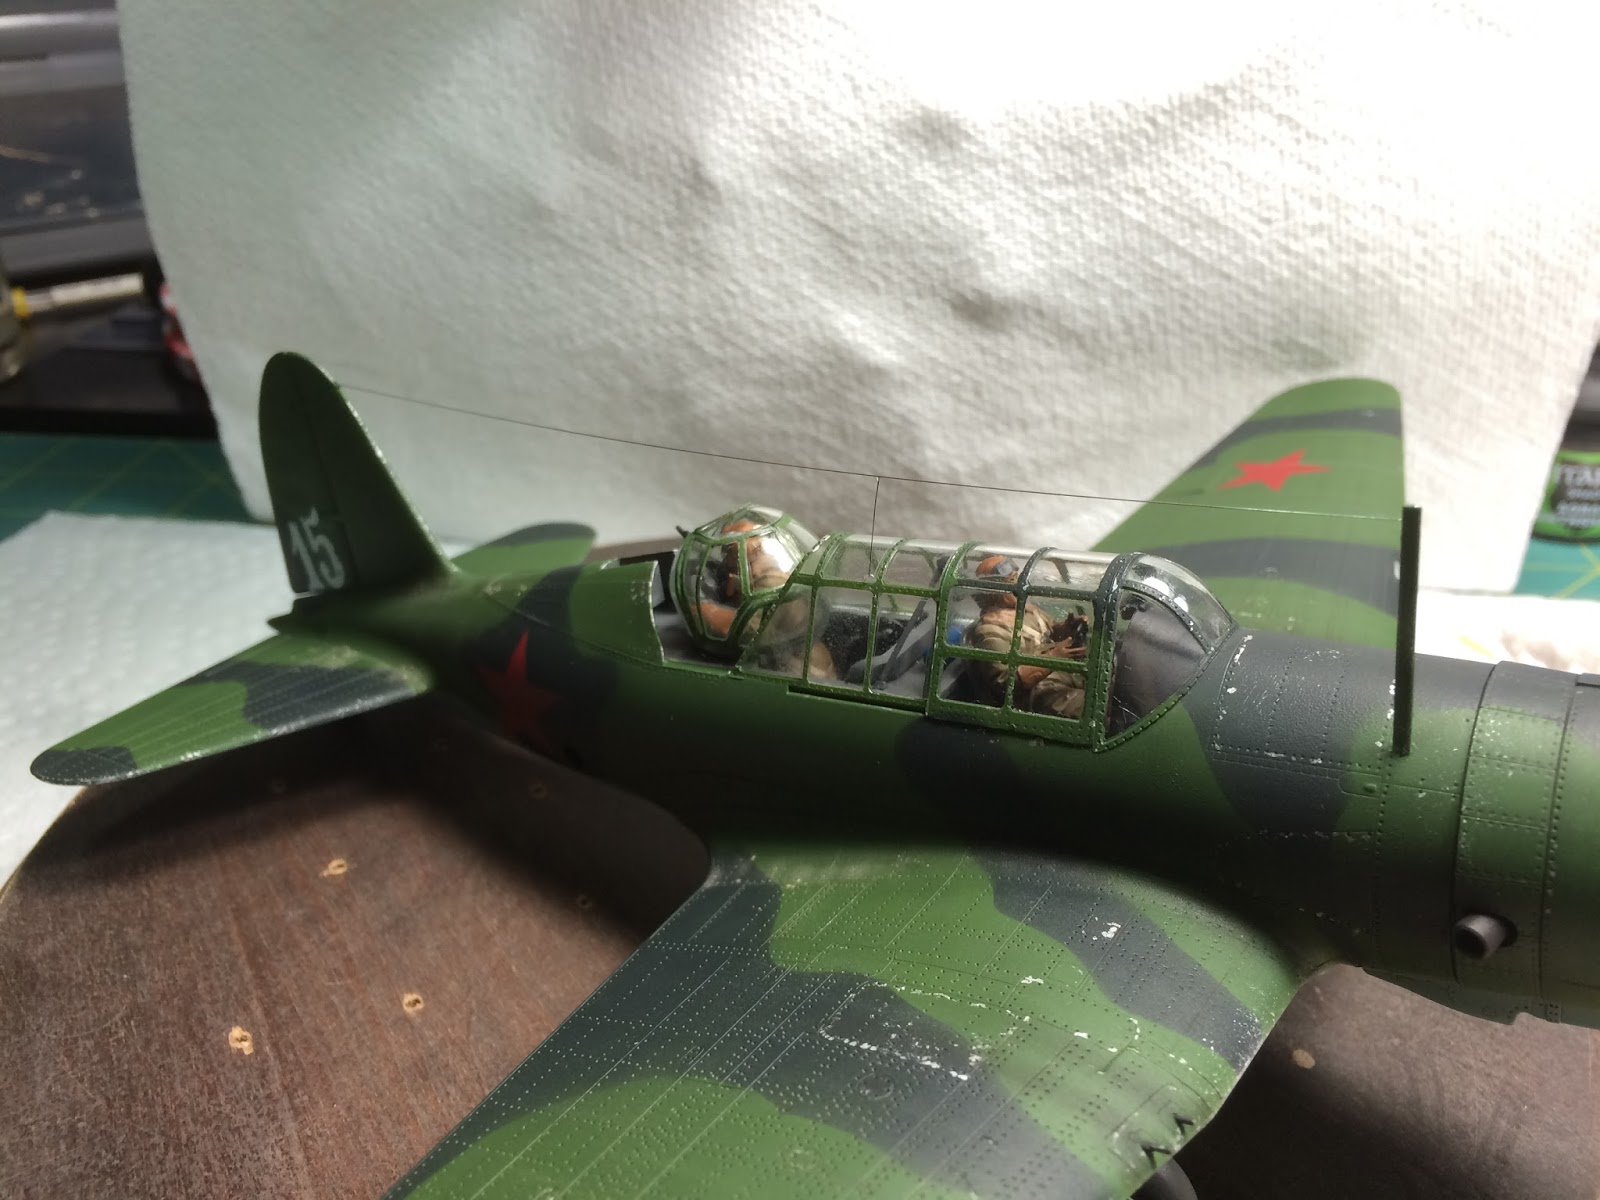
Model dulled down.  Turret installed. Antennas on.  All that is left is getting the base done and this thing is completed. 


Used Ammo by Mig pigments on certain parts of the wings and landing gear, MG smoke and for exhaust.  Used the pigment fixer via airbrush to seal it all in. 

Tuesday, September 8, 2015

UPDATE: SU-2 (BB-1) Light Soviet Bomber, WIP

It's been one busy summer.  I haven't built and painted much, but now with the fall on the way, I suspect I will be hitting the bench more often.  I will take the time now to upload some photos of my SU-2.  I have to say, I was NOT crazy about this model.  I like the subject, but man, it turned me off for some reason.  I like all the rivet detail, but other than that, details are not this kit's strong suite. 

My goal here is to finish it up and mount it on a simple base resembling a simple air field somewhere in the Soviet Union.  For now, here are some photo WIP updates. 

 Pilot.  Basic paint job and used the Citadel Washes/Shades.  Great product.

 Used Alcad II gloss clear coat


 Ammo of Mig PLW (panel line washes) for the appropriate color
 As you can see, the green and black camo have different panel line washes.  You can see the rivets do too. 


 Some minor chipping in select locations
 Streaking with Ammo of Mig products as well. 
Now for some more weathering on landing gear and flat coat and I will be calling this a day.   Putting that turret together and painting it on the rear was a NIGHTMARE!


Tuesday, June 2, 2015

UPDATE: SU-2 (BB-1) WIP

I fixed up some items on the base paint I didn't like.  Now its good.  I need to paint some other detail items (MG barrels, exhaust, etc) and seal it in for the decals and wreathing....BUT WAIT!  Must install the landing gear first!

My BB-1 in War Thunder.  I have bombed a few dudes in this sucker.  I prefer it with 6 100KG bombs to maximize my tank and AFV bombing power.


Monday, June 1, 2015

UPDATE: SU-2 WIP

So, it's been a while, apologies.   Been a tough few months.  In the mean time, I got some "trigger" time.  Here are some photos of the assemblies, masking and painting of the aircraft.  This model, though sold as an SU-2, is actually a BB-1.  Leave it up to Zvezda to make the mistake. 

I used Tamiya paints on the colors of this plane. 

 Filling and sanding seems.
 Adding Citadel wash to the copper color on the exhaust.
 Ammo of Mig White Primer
 Tamiya XF-3 Green base coat. 
You can see the pre-shading of the panel lines.

 Using Tamiya NATO Black instead of pure black. I also messed up and colored the WRONG infill in one spot.  OOPS!  Can you find it?  LOL
Finished Upper paint scheme.

Under belly pre-shading, quick and sloppy. 

Used Tamyia colors for this too.  Added one tiny drop of darker blue to get that Soviet Blue feel.

Done-ish


I have to extend the black onto the top of the cowling.  Touch up the blue lines to match up as well (underneath).


Misted some green lightly over entire model to fade the black camo a bit.  Plane will get a nice amount of weathering, so I didn't want the camo to look too new.

Over all, I like it.  The silly putty I used left an oily residue stain on the green paint.  I guess going fwd, I maybe need to seal the paint before applying???  TBD.

Tuesday, March 17, 2015

SU-2 Light Soviet Bomber WW2 - NEW BUILD WIP

Well, the FB group has started a new group build, which I liked the topic ANY BOMBER ANY ERA.  I have a Soviet SU-2 early model that I am building for this.  Not crazy about the standard camo, but I will need to brain storm this a bit. 

The model detail on the outside is nice.  It is a Zvezda kit.  I have heard horror stories about this brand, but they do offer nice subjects.  The panel and rivet detail is ok, but not too deep into the plastic, but the cockpit is CRAP! Here is what I have so far:
Box Art

freaking small pieces

Gaps!!!
Tried to fill gaps with liquid putty

I never understand why some companies don't think their injection mark locations better. 


Fit issues?

Trying to make it fit right.

 
After one wing glued tight, the other side is just flopping in the wind!

Tape and cement

Here it is with wings glued, and rest of it taped for a test fit.  minus the tail that needs tape, its did go together ok, just a lot of pressing, cement and tape.